 |
 |
| Love the detailing! |

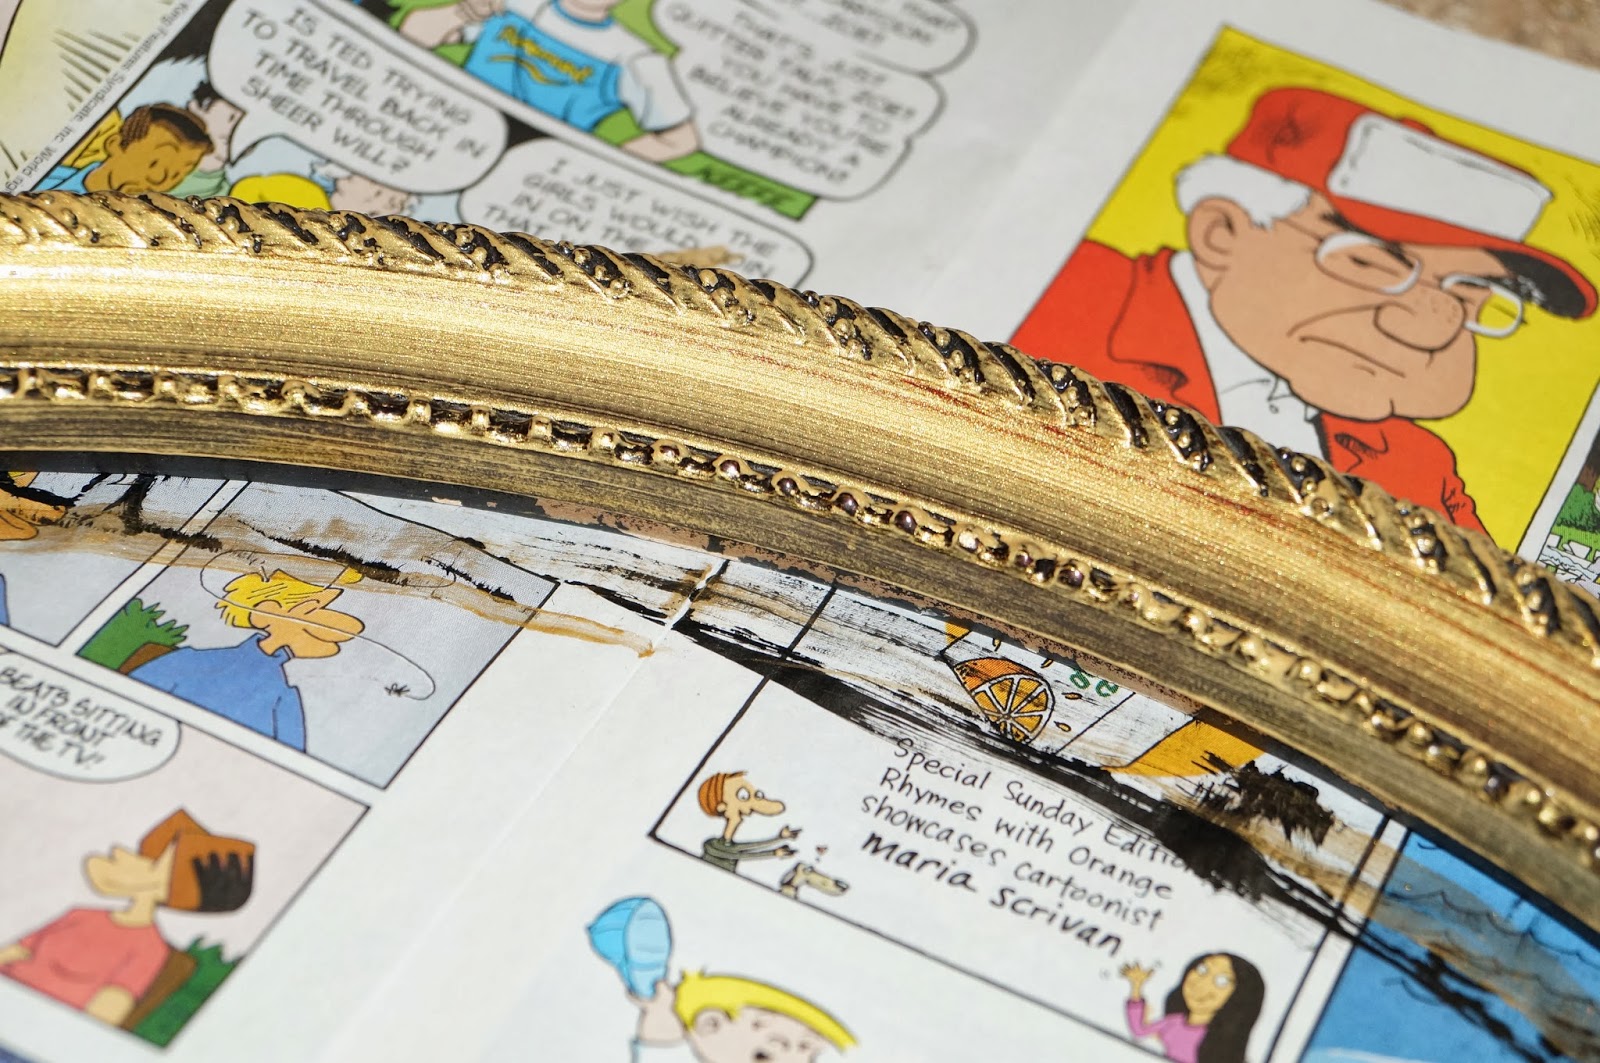
As you can see this frame has not had an easy life. It came with some nicks and slightly battered. No problem I say!
I didn't think the color was all that bad. I tend to really like the dark, rich colors. However, for this project it simply would not do. So, we paint! Hence like likes of Doonesbury and Family Circle in the background.
My pattern was simple....only three colors; black, gold and white.
Honestly, I can't remember if I painted the frame with a black paint as a base or not. I did this project a while ago and in looking at the pictures, some look like I might have and in others it appears the maroonish color is showing through.
Either way, after I did (or did not) paint the frame black, I lightly painted the frame with a metallic gold paint. I used the same technique as I did with the corkboard redo - simply paint and wipe! I didn't put the gold paint on very heavily or evenly, making sure it would miss the crevasses to give it a vintagey (that's a word, right?!), antiqued, distressed sort of look. Then, where the paint was a little too heavy, I wiped some off with a paper towel. Piece of cake! I just love the way it turned out!

 |
| DETAIL! Here it looks to me like there's some black paint peeking through the gold. |
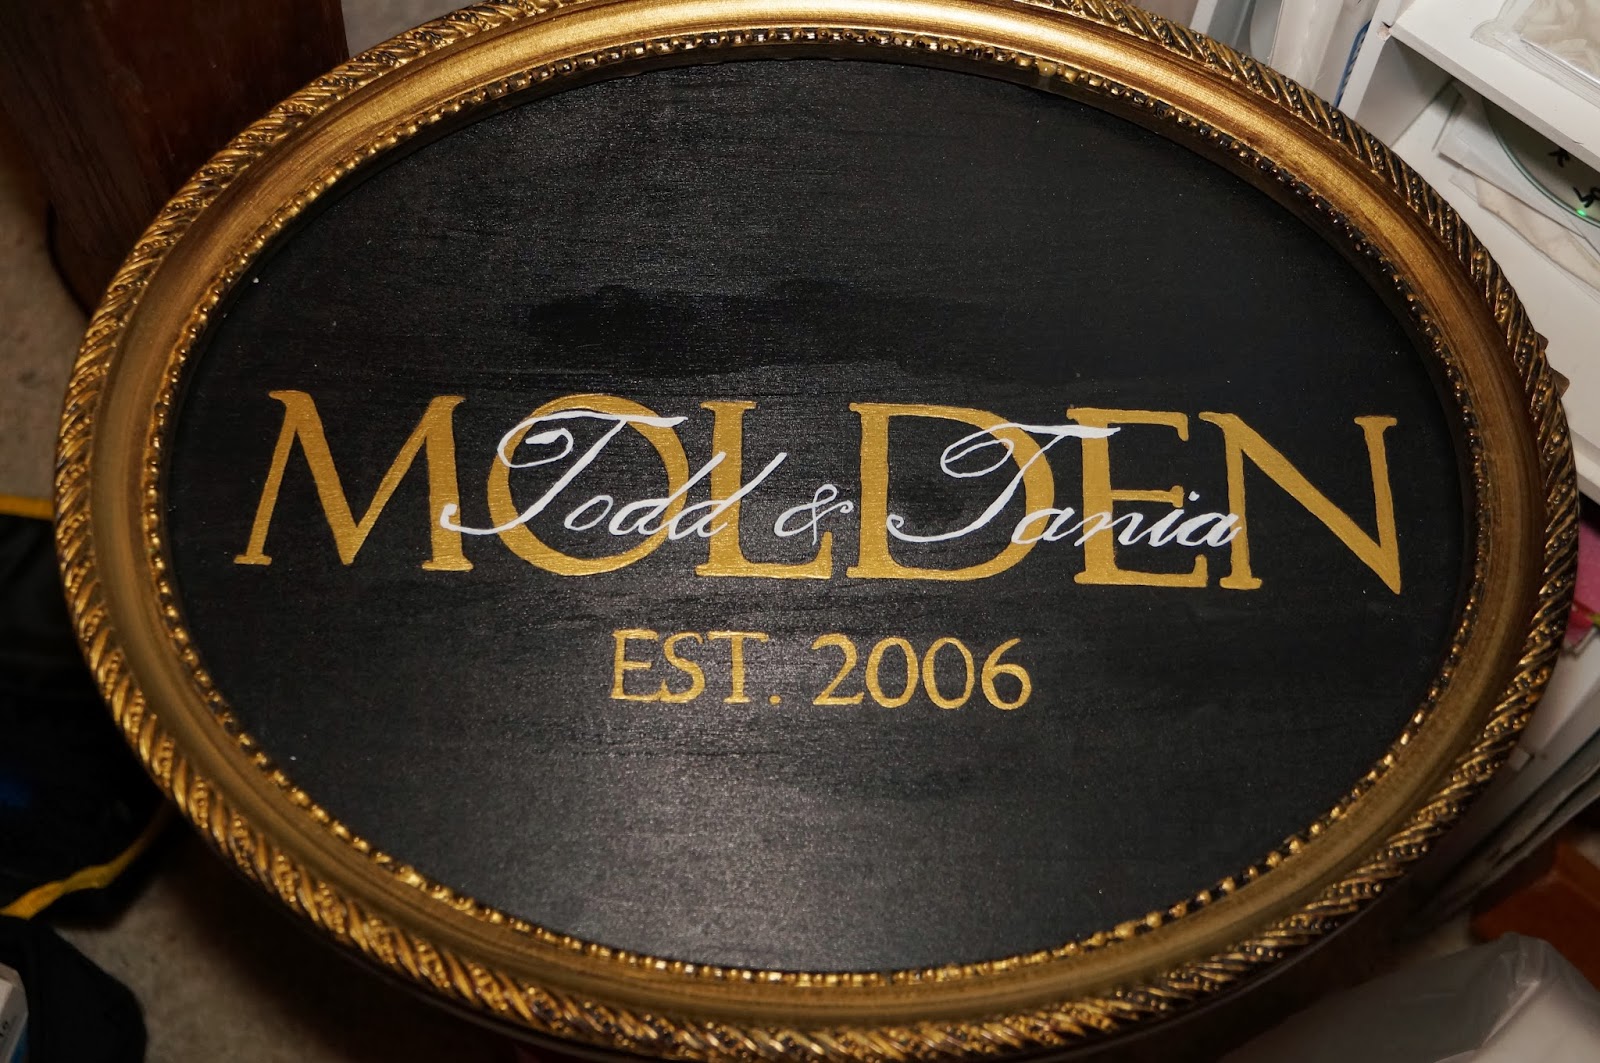
Now it was on to the big part of this project. I found an oval wood plaque at Michael's. This is also the expensive part of the project - $12.99. GASP! That's a shocker for this thrift shopper! However, sometimes when you need something very specific like this, you just gotta bite the bullet, unless you want to be thrift store rummaging for who knows how long in order to find what you need. No way! My time is worth a little something. If you can, use coupons!
I started by painting both sides of the wood plaque black. I used a color called black licorice. You might think black paint is black paint, but each one has unique characteristics. I like the black licorice color because it is a deep black color that isn't dull when it dries. It's not a glossy paint - I would say has more of a sheen to it than glossy look. I just really, really like it.
I do not have any photos of the wood plaque painted all black. I'll try to be better about step by step photos in the future. Sometimes I just get too wrapped up and excited that I actually have time to craft to think about stopping to take a picture.
I looked around the Internet for some inspiration. And in the end I didn't really find it. So, I just mixed a few ideas together to come up with a pattern.
I created a Word document to use as my stencil. I wanted a nice blocky type of font for our all caps last name and a nice flowy font for our first names, which I wanted to be over the top of the block letters. I made the stencils the size they would appear on the plaque.
Now this might be the trickiest part....getting everything centered. Here's how I did it - you might have an easier way (I hope you do!). I didn't trust measuring to the center from the edges because it's an oval and I wanted to make sure this was not going to be crooked. So, I traced the oval onto a piece of paper, cut it out, then folded it in half each way to create a center point, laid it onto the oval and marked the center point of the oval. Uff dah. And did basically the same thing for the letters, although with letters you can at least count and find the middle that way. It's a little easier. After finding the centers of everything, I positioned the lettering where I wanted it and taped it to the plaque. I missed a pic of this step too. Ooops.
After positioning the letters onto the plaque, I traced around them with a fine point pen, pushing down pretty hard. When you do that, it leaves an indentation in the wood and that gives you an outline to paint. I did this for the first time when my husband got bats from the Louisville Slugger plant for our nephews. I thought they should be personalized in some way, so I painted their names on them.


Anyway, back to the sign!
First I did the block letters as the base of the name sign. Keep in mind the indentations won't be super noticeable, so you might have to move the piece you're painting around a little bit as you paint so you can see your outline. Of course, this will depend on how much pressure you use when tracing the letters.
 |
| After a couple coats of gold paint. I believe I used four coats. You can also see the faint indentations of our first names over the block letters. |
After all the painting was done, I used wood glue to attach the plaque to the frame, and put a couple very heavy books on it until it was dry.
Here's the finished sign:
No comments:
Post a Comment